Create an automation schedule
An Automation Schedule files a task for you on a timer. Use one for work that recurs: a weekly status report, a nightly dependency check, a monthly documentation review. Each time it fires, it files one task per project you pick, and a runner works on it like any other task.
Who can do this: Schedule is shown only to Owners and Admins of your organization.
Create the schedule
-
In the sidebar, select Automation, then the Schedule tab.
-
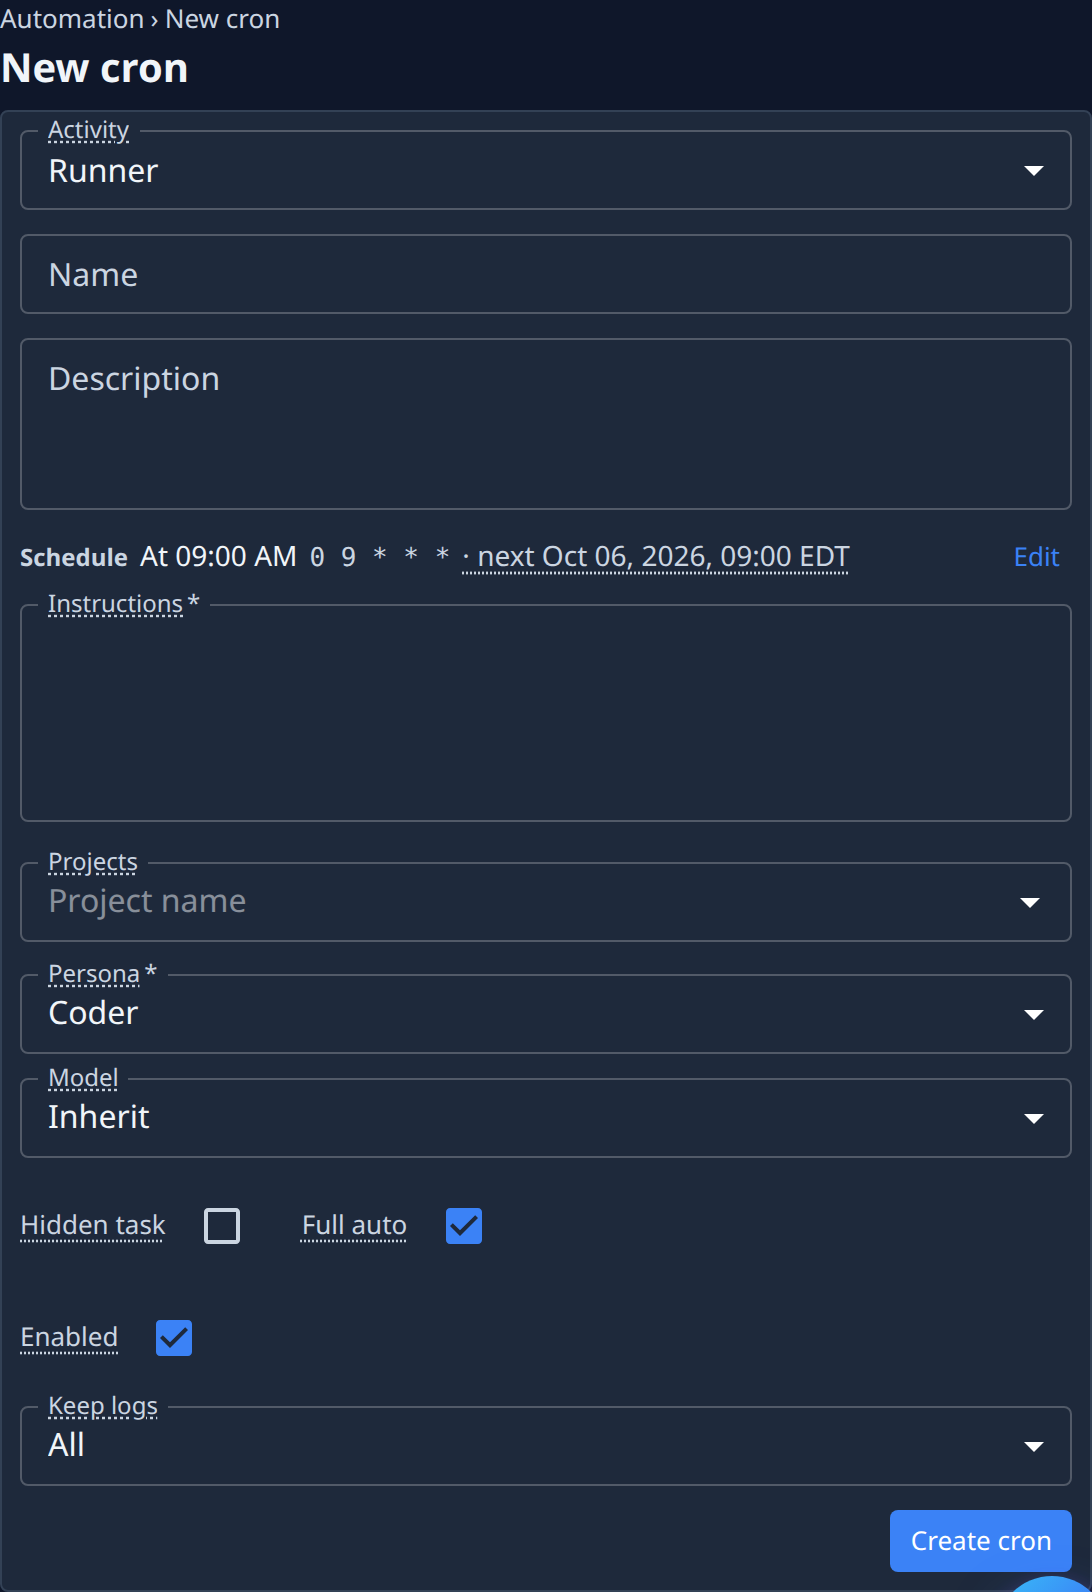
Select +. The New cron form opens.
-
Leave Activity on Runner: it files a task each time it fires.
-
In Name, enter a name you'll recognize in the list, such as
Weekly status report. To group schedules into folders in the tree view, use/, as inReports/Weekly status. -
Optional: add a Description saying what the schedule is for.
-
Set when it fires, as in Set the schedule.
-
In Instructions, write what each task should do, exactly as you would describe a task. This becomes the description of every task the schedule files.
-
In Projects, pick the projects to work on. Each firing files one task per project.
-
Check Persona: the kind of expert each task runs as. Coder delivers a change; pick another persona for work such as research or a report.
-
Optional: tick Hidden task to keep these tasks off the default task board.
-
Decide on Full auto. On, the runner never asks you anything and fails instead when it needs a person. Off, it stops and asks, and waits for your answer.
-
Leave Enabled ticked so the schedule starts firing.
-
Select Create cron. The schedule's page opens, and it appears in the Schedule list.
Set the schedule
-
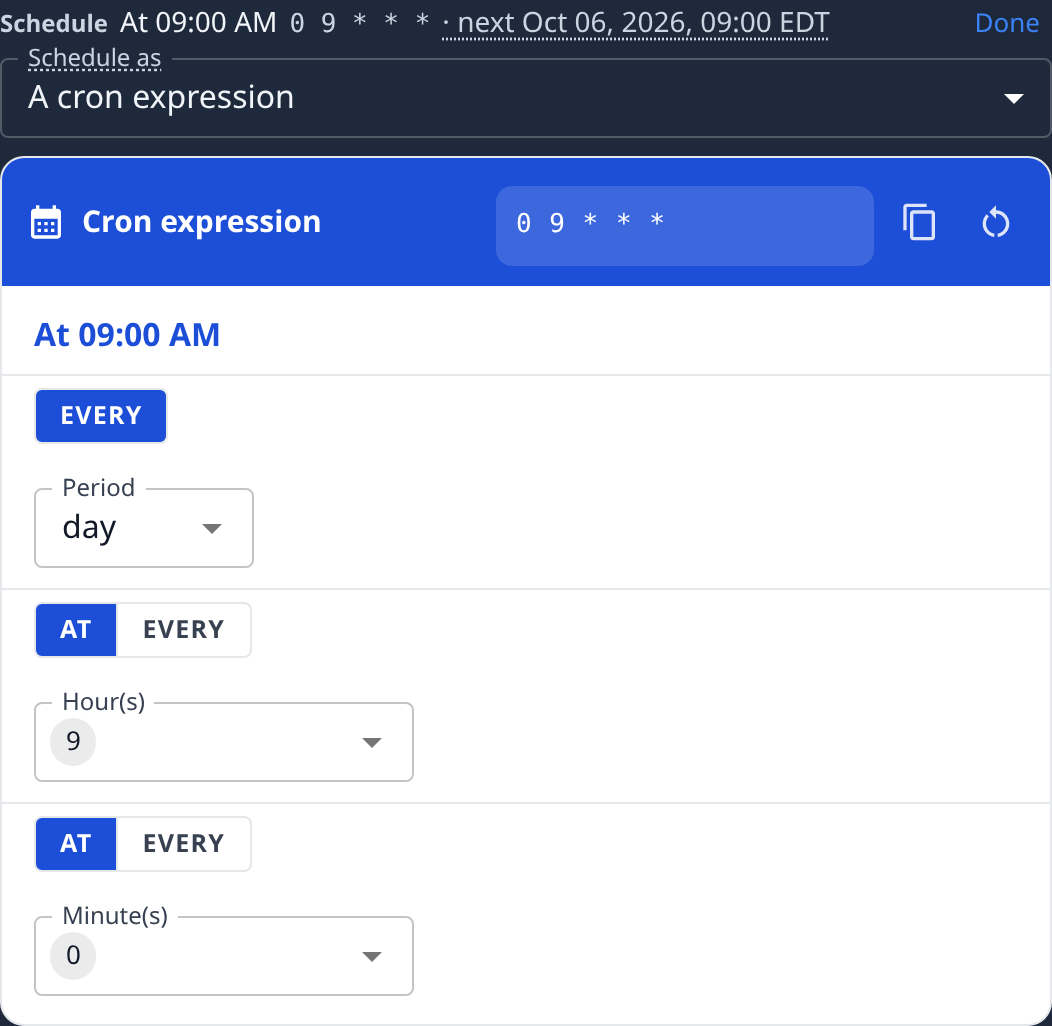
On the Schedule line, select Edit.
-
In Schedule as, pick A cron expression to fire at named times, or A fixed interval to fire every so many minutes or hours.
-
For named times, pick a Period such as day or week, then the days, hours and minutes it fires at. For an interval, enter Every and pick a Unit.
-
Read the summary on the Schedule line: it says when the schedule fires, in words, and when it fires next.
-
Select Done.
Check it
- Open the schedule from the Schedule list.
- Read Next fire on its Advanced tab.
- To see it work without waiting, select Run now. See Run, pause or change a schedule.
Related
- Schedule — every field and tab of a schedule.
- Start a task — how a task is written and what its settings mean.
- How schedules work — firings, states and how a schedule relates to tasks.