Drain or disable a node
Take a node out of service before maintenance, or when it misbehaves. Drain lets the tasks it is running finish, then disables it. Disable stops new tasks at once; neither one stops a task already running.
Who can do this: both need the permission to edit nodes. Without it, the items don't appear.
Drain a node
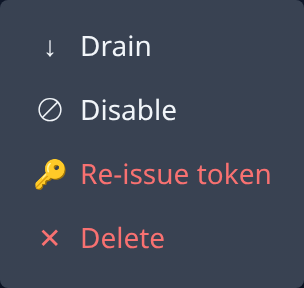
- In the sidebar, select Directory, then the Nodes tab.
- Find the node's row and select ⋯ at its end.
- Select Drain.
- Wait for the tasks it's running to finish. The node takes no new ones meanwhile.
- Check the row: once the last task is done, the node disables itself and Enabled no longer shows ✓.
To change your mind while it drains, open the row menu again and select Cancel drain.
You can also drain from the node's details: select its name, then Drain on the Overview tab.
Disable a node at once
- Open the node's row menu with ⋯.
- Select Disable.
- Check that Enabled no longer shows ✓.
- Select the node's name and read Runners on the Overview tab: how many tasks are still running there.
- To see which tasks hold its worktrees, select the Worktrees number on the same tab.
Put it back in service
- Open the node's row menu with ⋯.
- Select Enable.
- Check that Enabled shows ✓ again.
- Check that its dot is green: see Read a node's status.
- New tasks start on it as soon as it has a free worktree.
To remove a node for good, use Delete instead. That deletes every worktree on it and ends what runs there; it can't be undone. Read what it does first in Nodes.
How Enabled, Draining and Disabled differ is explained in How nodes work.