Choose a basic pipeline
Every project with a repository runs on a pipeline: the way merged work reaches the place it runs. Any plan can pick one of two basic pipelines, ready-made with nothing to design:
| Pipeline | What happens |
|---|---|
| PR into integration branch | Merging a pull request into the integration branch deploys it to the live stage. One live stage: Production. |
| Integration + Release | Merging deploys to Dev. A release then moves Dev's code to the release branch and Production. This is the one a new project starts on. |
Custom pipelines, with your own stages, steps and rules, are a plan feature (Custom pipelines). This page covers the basic ones.
Who can do this: anyone who may edit the project. Others see the section but can't change it.
Pick one
- In the sidebar, select Directory, then the Projects tab, and select the project's name.
- Select the Settings tab, then CI Pipeline. It shows only on a project with a repository.
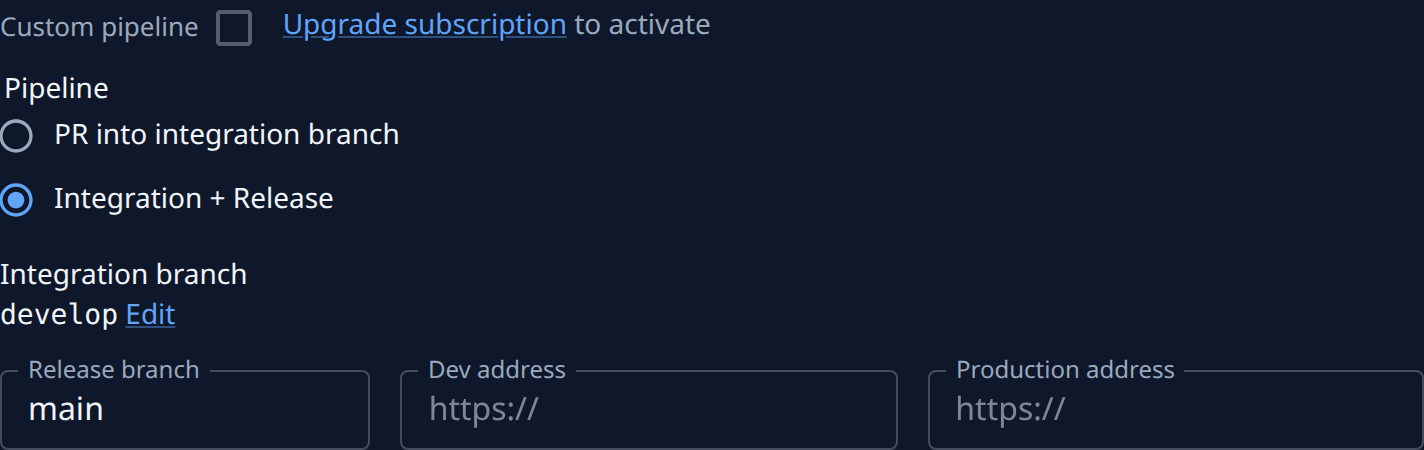
- Under Pipeline, pick PR into integration branch or Integration + Release.
- Check Integration branch. It shows each repository's integration branch, read only here; Edit beside it opens General, where it is set.
- Fill in the fields the pipeline has:
- Release branch (Integration + Release only): the branch a release moves Dev's code to,
mainat first. It can't be empty. - Dev address (Integration + Release only): where Dev runs, such as its web address.
- Production address: where Production runs.
- Release branch (Integration + Release only): the branch a release moves Dev's code to,
- Select Save pipeline. It shows once you change something; Cancel drops your changes.
CI Pipeline shows ● On beside its title while the project runs on anything other than Integration + Release.
What a basic pipeline sets for you
On a basic pipeline the stages, the gates and the branch prefix are the pipeline's own. Settings › Branches shows the branch prefix and Testing the full gate as Set by the CI Pipeline, and the project has no custom pipeline to edit.
Custom pipeline
Above Pipeline sits the Custom pipeline box. Where your plan has no custom pipelines, it stays off with Upgrade subscription to activate. With them, tick it and select Save pipeline: its stages and steps appear under the box (Set up a project's pipeline).
To go back from a custom pipeline to a basic one, untick Custom pipeline, pick a basic one and select Save pipeline. Jaah asks Replace the custom pipeline? first: its stages and step rules become the basic pipeline's, and earlier versions stay in the pipeline's history. Select Replace to go on.
If your organization's plan loses custom pipelines, a project already on one keeps running it as saved, read only, until you pick a basic one.
Related
- What a project's pipeline and its stages are: How projects work.
- Running a release: Release to production.
- Building your own stages and steps: Set up a project's pipeline.
- Every field of the Settings tab: Projects.